


 It's the first week of summer vacation here and that means Vacation Bible School! We always get a t-shirt as part of our VBS. They're cute, but plain. Because I'm one of those annoying people that can't leave things plain, I always jazz them up a bit. They turned out really cute, and I'm considering making one with a plain tee for myself. Plus, it was quick and easy (it took about 20 minutes per shirt!) Here's how I made this year's version:
Supplies:
t-shirt
scissors
fabric scraps that are long enough to go around the front neckline of your shirt (I used a white muslin)
rotary cutter and mat (optional)
sewing machine
beads (optional)
needle and thread (optional)
 First, take your scissors and cut off the neck of the t-shirt. You'll end up with something that looks like this:
 I cut 1/2" strips of my muslin and pinned them around the neck of the shirt. I started and stopped each muslin strip at the shoulder seam. Then, I sewed straight down the middle of each strip. I did a total of 3 strips around the neckline. (I have a thing for odd numbers)
 Once I had the strips sewn on, I added some beads. I sewed these on by hand. I did a total of three groups of beads. One between the first and second strip on the left side, one between the first and second strip on the right side and one between the second and third strip smack in the center. Here's a close up that shows the beads:
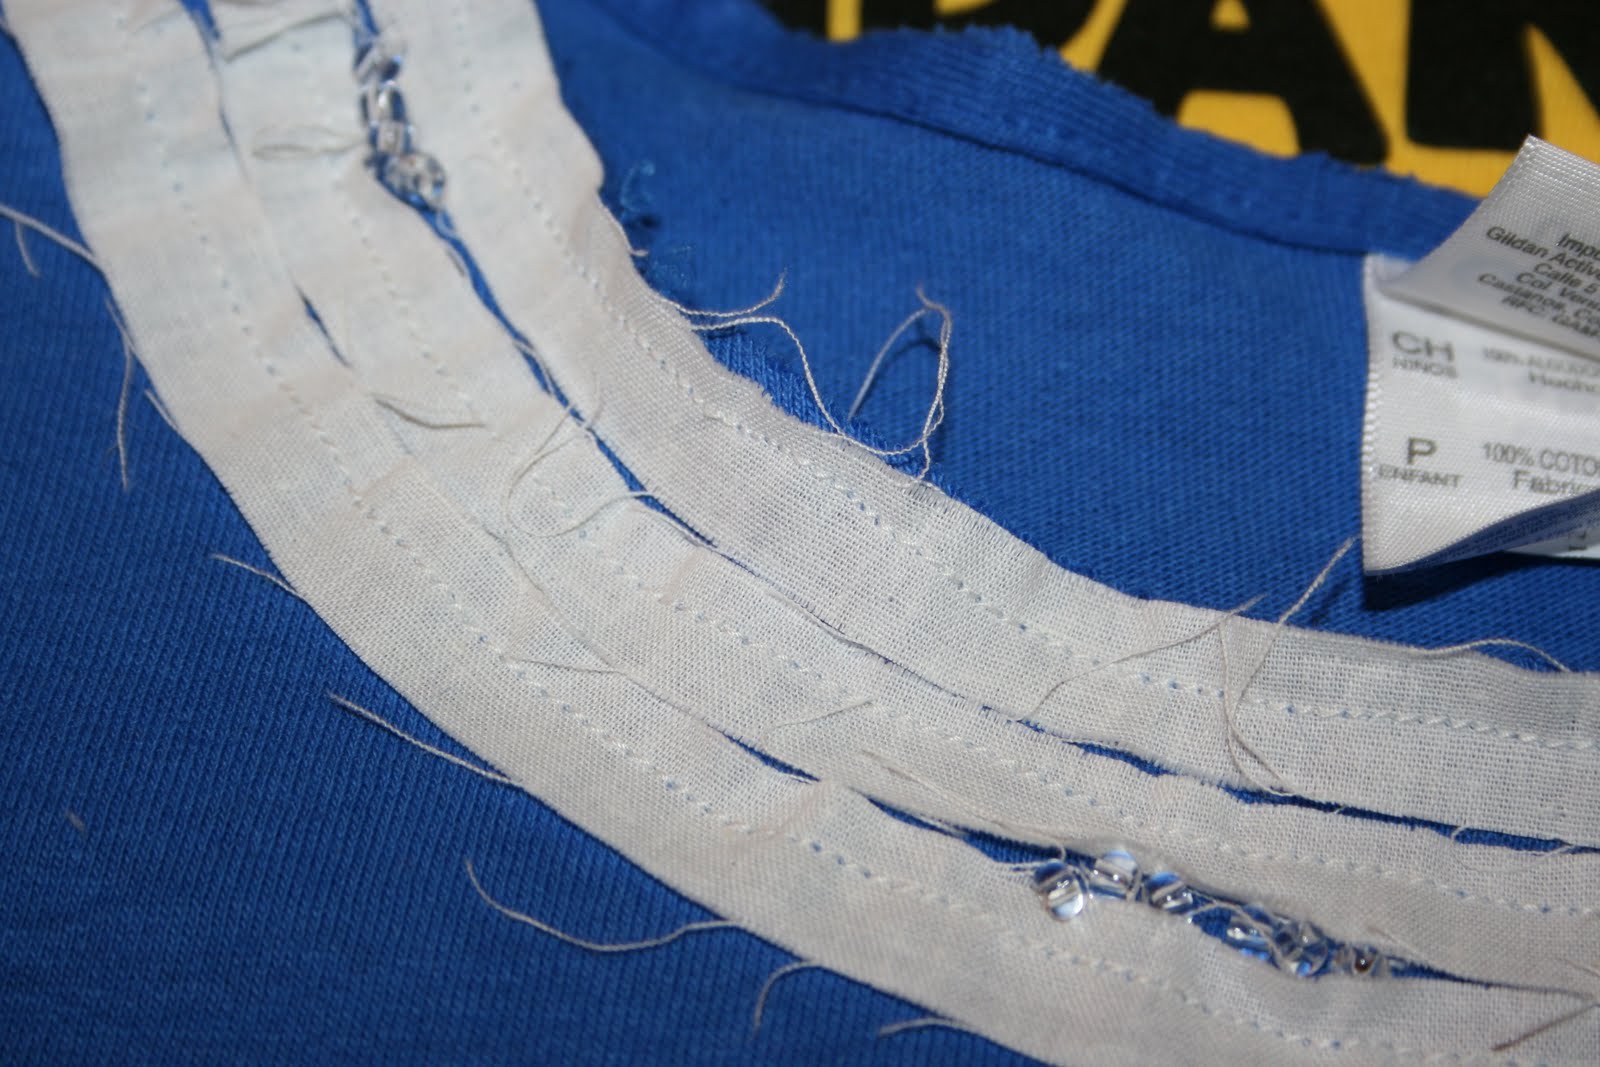 Once I was done with the neckline, I decided to use my scraps and do the sleeves, too. (Seriously, I can't leave well enough alone!) So, I folded the edges of the sleeves up one time (so the underside showed) and sewed my fabric strip right over the top of the stitching.
 There you have it: a quick and easy way to dress up a t-shirt!


No comments:
Post a Comment